Showing posts with label home decor. Show all posts

Friday, February 17, 2012

Gallery Wall "Reveal"

Wow....it feels SO good to finally be done with this project!!


 I have been dreaming of it ever since I saw this on House of Smiths...


So GORGEOUS!!  And I had just completed this board and batten in my living room...it was the PERFECT idea for this long wall....


So when a friend came into town, we made our way to IKEA and bought a TON of white frames to make my own gallery wall...just like Shelly's... ; D  Since I couldn't make beautiful Subway art like Shelly (she has a vinyl business), I was hoping to find some type of word art that would work.  My friend and I found this at Hobby Lobby and I loved what it said, but obviously the colors weren't right.


Ummm...that was in October!  ; )   Before she left, we had the layout all designed and I was just waiting for all the pictures to get printed.  I got the pictures, hung most of the frames...but then, I ran into a roadblock.  There was a space in the center of my design that I had left open for a large Y (since we are Youngs).  And none of Hobby Lobby's large alphabets came in a Y.  Can you believe it??  I was so frustrated and had no idea what I was going to do since I had already hung all the pictures and had left a space for that imaginary Y that I just knew I was going to find!

So...I just kind of moved on to some other projects for a few weeks.  Then one day, a friend encouraged me to go to Hobby Lobby again and just LOOK at what they did  have.  And what do you know?  I was able to find the right elements once I opened up the possibilities a little.


I found a large Fleur de lis that could fill the spot I had left for the large Y.  I found a smaller Y that worked fine (once I painted it) and I found a candlestick that worked.  And I found this little guy...


I love this bird.  He is so beautiful and the moment I saw him I knew he belonged on my shelf!!  He was even the perfect combination of blue and yellow! ; )


Here's a few pics of the process:

I started by cutting craft paper to the size of all my frames so that I could tape them up there...just like Martha Stewart tells you to!  (Sorry for the bad pics...I was without a wide angle lens on my camera at this point...)


One time I came down the stairs hearing the sound of hammering...and this is what I found...


The funniest thing is that he actually nailed in the exact right spot and it was straight and everything!! ; D

He was so proud!

And remember this?


Well, I have a fabulous friend who is a graphic designer and she designed this for me...


 I. LOVE. IT.   Love the colors...love the fonts...it is just exactly what I was envisioning!!

So...here it is...finally finished and I absolutely love it.  It was so worth all the work and effort.


The photos were taken by my AMAZING friend, Raquel Acevedo.  I am so lucky to have such a talented friend.  I love ALL of the photos, but we actually had multiple whole family shots that turned out.  (That must mean our kids are finally  growing up and no one is making crazy faces.)

My two favorites are these:


 Oh, I just love when a project is completely done!  It is this feeling of accomplishment that keeps me cooking up my crazy schemes for projects around my house!  Next project to put on the list:  a fabulous re-do for this little lamp shade.  Just gotta find the right fabric!

Wish me luck!

Thursday, February 9, 2012

The Perfect Side Table for my lamp...

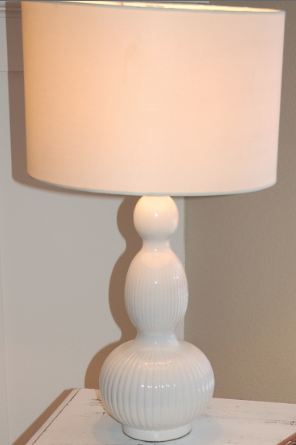
Over six months ago, I saw this lamp on clearance at Home Depot.  I did not have a single place to use a lamp of this size, but I just saw so much potential in its beautiful curvy base and the simple round lamp shade.  I LOVE this look compared to the more typical A-lined lamp shade.

So I bought it, put it in my closet, and started keeping my eyes open for a perfect side table.  It had to be small enough to fit with my living room furniture but large enough to balance the lamp.  I certainly didn't want something too small that one of my kids would surely tip over and CRASH... there goes my lamp!
Oh...and it really couldn't be very expensive!

I never specifically went shopping for a side table, but I just kept my eyes open wherever I might be...and it finally paid off!  My son takes a SuperHeroes dance class (it is SO awesome for a little 4 year old boy!) upstairs from a little boutique shop.  And there...just across from the stairs...was MY perfect side table!  With a price tag of only $45!!  Hooray!

This is what it looked like when I brought it home...


I decided to paint it a light mustard yellow.  Even more awesome...I was dejunking some old paint and came across a quart that was almost full of a light cream color.  So I took it into Sherwin Williams and had them just add some tint of a color I liked, had them tweak it once or twice, and found the perfect  color.  All for free.

Confession: I am a little bit obsessive when it comes to paint colors.  Out of the dozen colors I have painted right now in my home, only 3 of them are straight off of the color chips.  All the rest have been tweaked to my weird and crazy desires and then custom matched.  I think that the people that work at Sherwin Williams just cringe when they see me walk in!  ; D


I gave it a nice coat of the paint... (my FAVORITE paint in the world...Pro-Classic...it is SO smooth and creates a beautiful smooth surface on furniture!)...and then rubbed it over with some gel stain.  I love gel stain!  The coolest thing is that it if turns out too dark, you can simply spread on more gel stain and then wipe with a clean cloth and it will remove much of the original stain!!  Even an hour or more later!   I did that a couple of times to get the right look I wanted.  And I am seriously in love with how it turned out...LOVE. IT.


It just brightens the room to have this adorable yellow table right by the window.  Now, I am scouring fabric stores to find the perfect fabric to cover the lamp shade.  I am looking for something to tie the room all together and also be a bit of a pop of color.  I have the most fabulous idea for covering it that I saw at a fancy, expensive boutique...so I'll let you know how it turns out!

Sunday, July 3, 2011

Super Fun Subway Art

I've been browsing a little bit this morning on the blogosphere and came across these cute subway art ideas.  They are free to download, so I though I would share them.  I downloaded all of them and just put them in a folder on my computer...just so I have them for the years to come!

They are over at eighteen25.    Here's the link to all their subway art.

Enjoy!  And have a wonderful Fourth of July weekend!

Friday, April 22, 2011

Spring Kissing Ball

OK...so I haven't posted in a while...and mostly it is because I have not been doing projects.  To be honest, I haven't even completely finished the ones I was doing!  ; )

You know how it goes...they are about 90-95% finished and then you just lose all your momentum.  I have a LOT of caulking to do and I just dread it...so I have been procrastinating!!  Instead, I have been reading up a storm.  So if you happen to be my friend on Goodreads, then you know why I haven't had time to do projects and post about them!  I am busy trying to keep up with my husband on our reading goals for the year.  He is a book or two ahead of me...how does that happen??  He works ALL the time and he is still ahead of me.  Well, technically just in number of books...but I am sure I am ahead in number of pages!! 

Oh, and I must admit that I have been playing with my new iPad a litle too much.  That thing is just too versatile and so convenient.

But...anyway...here is a little spring project I did a little while back.  I love the look of kissing balls, but I've never made one.  I started to make some for Valentines day with those little crepe paper roses, but I never got around to buying the styrofoam balls.  So next Valentine's I will probably actually finish that project.  I have a box full of roses just waiting....

 These flowers were on a great sale at JoAnn's and my house was in need of some cheerful Spring decor.  So I thought they would be perfect....

I simply popped each flower off of its stem and put some hot glue on the back...


...and stuck them all over the ball.


I used some hot glue and a push pin to attach a beautiful spring ribbon (found at the Dollar Store!) and hung it in front of my mirror.  Then as I was scouring my house for other "spring-y" decorations, I remembered about these little chinese lantern lights.


Two years ago when we bought our patio set, we bought these.  I had envisioned them hanging from our patio umbrella and how darling they would look....well, we've never even brought them out of the box.  I love how they look on the mantel and I just plugged them into the outlet that is hooked to the lights above, so they all come on with one flip of a switch!!

Tuesday, February 1, 2011

Happy February!

Over the years, I have not been very good at decorating for all the different holidays.  My kids always complain about my lack of Halloween decor (I hate Halloween!).  But most of the time, I just feel like all my time and money is going into our everyday decorations...the lamps or side tables we still need...or the perfect piece of art work we are still searching for.  This year really isn't that different...but I happened across some really cheap and fun Valentine's ideas and a great clearance aisle at Hobby Lobby.  So our house actually looks like it's February!

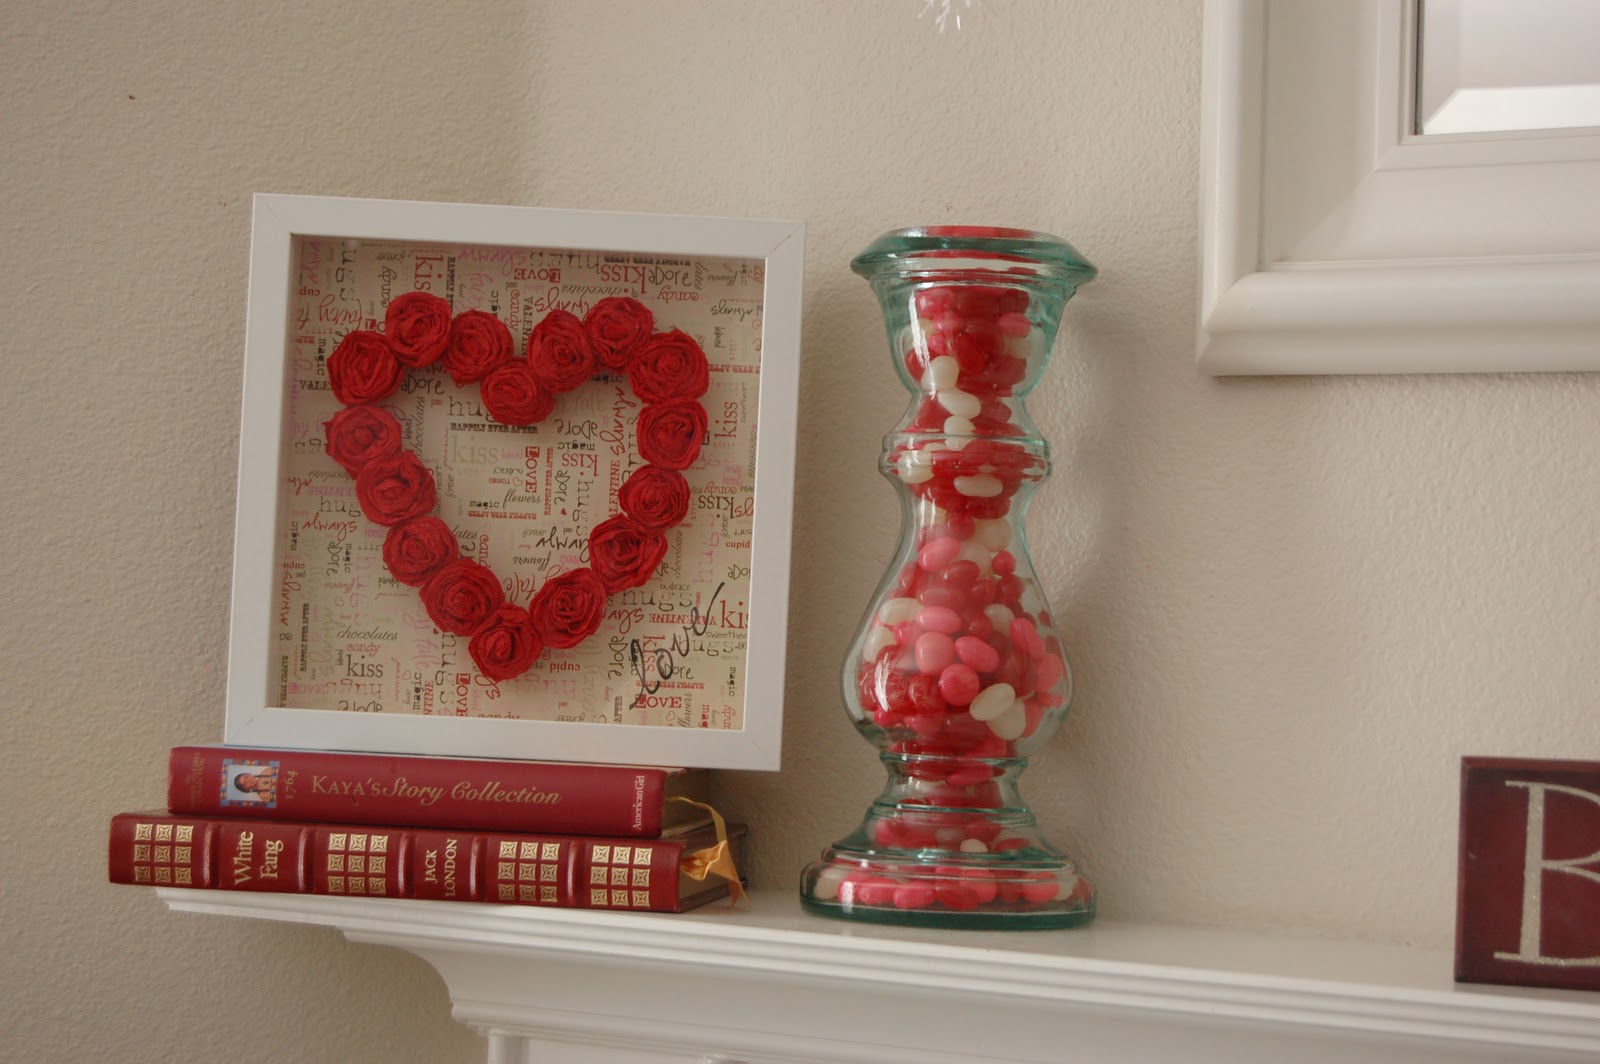
I made this little heart frame out of crepe paper roses (that's a tutorial over at House of Smith's). 


I got the frame at IKEA.  It is perfect for this project because it is a deeper shadow box frame.  I ran into Robert's Craft and grabbed a few papers that I thought might work.  I had the hardest time deciding but finally went with the Valentine words paper.  The crepe streamers are from the Dollar Store.  Two rolls for $1.  You can't beat that!


I hand drew a heart onto the paper and started gluing the hearts on with a hot glue gun.  To help them lay more flat, I cut off the bottoms of each rose and used some glue to hold the back of each rose together.  At this step, I was glad I own a low-temp glue gun!  ; )


 When I was at Hobby Lobby, I found this adorable hollow glass candlestick.  I've been meaning to get a red or pink candle for it (it has a little lip at the top edge to hold a candle), but I think it looks adorable with the candy in it.  I was gone for 24 hours over the weekend and somehow about 2 inches of the candy disappeared...or maybe it just settled?  ; )  I suspect that won't be the last time it needs some refilling! 


 Now, I am working on some hanging balls with the crepe roses to take the place of the snowflakes.   I made a lot of roses on my little get-away (when I wasn't eating!), but I still have a lot more to make so I can cover multiple balls. 


I found these letters at Hobby Lobby for 50% off.  OF COURSE, they were missing the V in the pink (they only had pink, green, and black), so I bought a black V and spray painted it red.  These sit on my piano...when it's not being played by one of my girls or any of my piano students!


This frame was a hideous gold thing that I found at Ross a couple weeks ago.  But I loved the shape of it and knew I'd like it once it got spray painted.  The print was free here.  
Hope you have a great February!  And a wonderful Valentine's Day!